|
|
|
| | Home | News | Tutorials | Downloads | FAQ | Screenshots | Links | Credits | | |
|
Right after the Splash Screen you need to select the Video Source.
In this case an AVI file found on hard disk was selected. You can
select the file by simply typing the name or by browsing the hard
disk. Additionally you can get information about the selected AVI
file clicking the "?" button. Eventually you can select the Video
Source from your DV Camcorder or from an Internet Video Stream.
Please Note: |
||
|
After selecting the Video Source you can seek the video. If the
Video Source is Live (e.g. from Camera or Internet Stream) seeking
makes no sense since the source is real-time. After seeking the
video you can Mark In or Mark Out the proffered interval and add the
selection to the Selection List or simply get only one frame into
Selection List.
Please Note: |
||
|
Individually on particular captured frames or on all you can add
effects to correct the output or make it fancier. Those effects are
plug-ins which can be used in the Apply FX screen.
Please Note: |
||
|
Each plug-in has a user interface (sliders, checkboxes, knobs, etc.)
which allows changing the effects properties. You can see the
result, real-time in the small thumbnail found in the Apply FX
screen. The settings are persistent during the application execution
and reset to default values when starting. Please Note: |
||
After applying effects to the particular frames you can tune up the
output for:
|
||
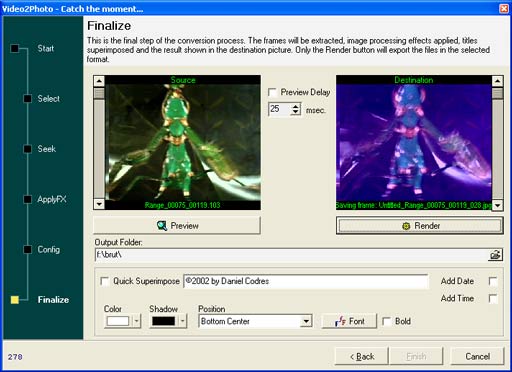
| Finally you can preview or render your work. The frames will be captured and placed to the location specified in this screen. Additionally you can superimpose a text over each frame or the current date/time. To cancel the Rendering/Previewing process you need to press Cancel button. | ||
| If the installed DV driver supports deck control you can call this window and control your camcorder. | ||
| When getting frames from a Live Source (Camera) 25 frames are preserved in the memory in real-time. Ten before the capture Click and 15 after. This is very useful when trying to get the right still picture. | ||
| Resampling the picture with 50% or applying Deinterlace effect you can get ride of the interlacing artifacts. | ||
| The Web Gallery output is customisable. | ||
|
Video2Photo is FREE. No charge will be taken for using the application. Whatever you do with
Video2Photo you shall take care to not break the copyright clauses when
capturing from various media. The author takes no responsibility for illegal
usage of the Video2Photo software. |